Monday, May 12, 2014

Reupholstered Night Stand DIY & My Undying Love for Thrift Shops

It was around this time last year that I fell in love with thrift shops. I was planning a 90's birthday celebration for my friend Sarah and needed to find some fabulous 90's attire. My first experience in the thrift shop was one I will always remember. It awakened all of my senses in a refreshing, nostalgic kind of way. Like when you hear a song on the radio and it reminds you of a fond memory from your childhood. Or when you smell an aroma that brings you back to a time where life was so pleasant and you didn't have a care in the world. Well that is what that first thrift shop visit was like for me, and that has been my experience ever since. Hi my name is Jackie, and I am a thrifter.

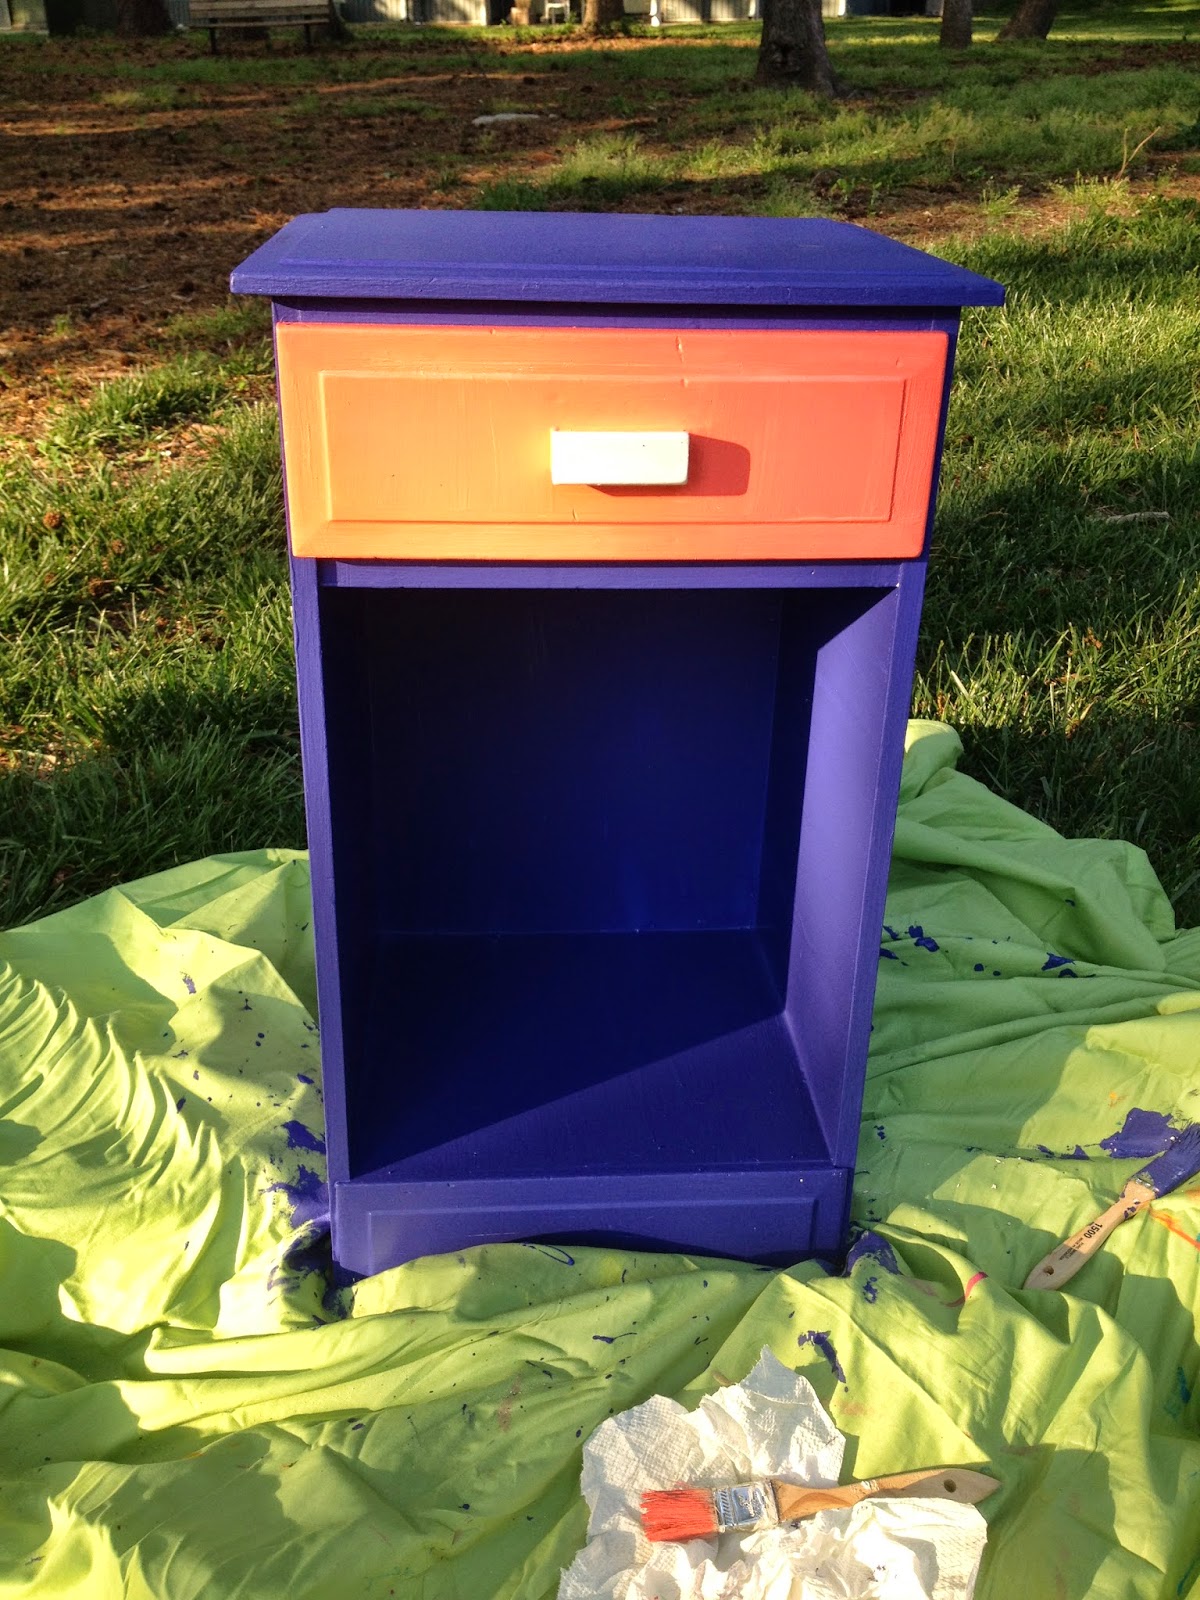
So this morning I decided to pop my little head into one of my favorite nonprofit thrift shops downtown. I like this thrift shop because it is ran by a church and 100% of the proceeds go to the homeless in the local community. Also they have great prices and very unique finds. Plus one of the volunteers has a little crush on me so he allows me first dibs at the new inventory not yet put out for sale. This morning as he was wooing me with antique unchartered territory, we came across the cutest little white night stand. I asked him how much and he said (in the creepiest voice) "for you Jackie 3 dollars", and well...the rest is history.

From there I went to home depot to pick up a paint sample  ($2.98), and several hours later I am staring at the cutest little color block night stand I ever did see.  I never really watched any tutorials on how to paint. I always just wing it and have been happy with the results thus far. I didn't bother sanding the table first because the wood was already so fine (and I was being lazy), but if it had had a thick and shiny wood finish I would have stripped it first with sand paper. The coral color on the drawer is from a small bottle of paint my friend Sarah (mentioned above) bought me for my birthday from Michaels. I imagine it cost just a few bucks.

Usually my projects are inspired by pinterest but this particular one was inspired by my other friend Sarah. (Sarahs...they love me). Every time I go to her house I am always taken aback with a new reupholstered thrifted treasure of hers. She is the reason I knew about the inexpensive paint samples that I think I could probably paint an entire wall with. I enjoy incorporating my upcycled décor into my event planning business. I plan to put this night stand in my office once Jacquelyne Edith Events, LLC finds a home. I hope this inspires someone out their or that it was at least entertaining. Until next time!

Jackie


Saturday, May 3, 2014

Vintage & Lace Painted Mason Jars


I want to start off by saying I LOVE PAINTING! I don't know what it is about it, but it's just so soothing and relaxing...and painting solid objects like mason jars...omg! There's no pressure to stay inside the lines or make perfect strokes. It's just...painting. Needless to say I really enjoyed this project :)
 
I purchased a four back of short mason jars from target for around 5 bucks. I spent a little over 7 dollars for the Martha Stewart White Crackle Paint and two 97 cent 1500 Pure Bristle Brushes. The removable lace stickers were from Michaels and cost 2.49 a pack. I bought two and still had some remaining after decorating four mason jars.
 
I painted the jars, let them dry, applied a second coat, and then applied the lace stickers. It was a very simple project. The crackle effect of the paint makes them look aged so you don't have to do anything extra to give it that vintage look. If you want to put flowers other items to that will stick outside the jar, you simply pop out the tops and screw the lid back on. I really love the way these turned out and plan to use them in my upcoming style shoot. They can work as center pieces, candle holders, or as décor around the house. Hope this was helpful or at least entertaining to someone out there. Until next time!
 
      -Jacquelyne Edith


Friday, April 25, 2014

Circus/Carnival Themed Birthday Party


Once a month Jacquelyne Edith Events, LLC, throws a free of charge birthday party for the kids at the Marshall Center and Lassiter Courts Center Boys and Girls Clubs. These events are themed and we have a lot of fun putting them on. This months theme was Circus/Carnival. It was the very first party of the year, so we celebrated all of the kids who had birthdays Jan-April 2014. 
 
Choosing a Theme
Once I decided on a theme I of course went straight to Pinterest for some [p]inspiration. As much as I love Pinterest, I will admit it can be a bit discouraging at times. Like really...do these people take out loans to fund these awesome, extravagant, over the top birthday parties for their two year olds? I digress. I decided to do the best I could with what I had. My biggest challenge was working with the space I had. I always do recon first, scoping out the area, the furniture, and taking pictures of the space. sometimes the way things are and the way we remember them being are two very different things. Any who, the Marshall Courts Boys and Girls Club is a pretty old facility with outdated furniture and whoever designed it had a serious obsession with brown. Not that I have anything against brown, but too much of anything is well...too much. So working with an older facility I decided to go for a vintage circus/carnival theme.
 
Purchasing Supplies and Décor
After what seemed like endless hours surfing Pinterest boards, I visited my local thrift shops. I found two vintage bag gammon suitcases, and a red table cloth for my display table. From Wal-Mart I purchased disposable transparent lace table cloths, treat bags, pin the tail on the Zebra, an awesome polka dot photo booth backdrop with props, a beverage dispenser, cups and napkins, plastic utensils and tickets! Target had the most perfect plates, and party hats. From party city I found huge colorful candles, red lanterns, and reusable red table clothes. I went to Michaels for decorative paper and rope for my flags, and that's also where I got chalk board labels that don't like to stick to anything for longer than five minutes. And my last retail purchase came from Costco, which was a huge jar of assorted flavored jelly beans!


Thinking Green
I always find a way to utilize the items in my recycling ben, when coordinating an event. For this party I used recycled wine coolers as bottles for ring toss, and a recycled spaghetti jar for the Jelly Bean Guessing Game.
 
The Party
As soon as the children came through the door we had them go straight to the display table where they were given party hats, 10 white tickets for games and treats, empty treat bags and poured lemonade. Once they received all of their items they were seated to eat. We purchased whole wheat Subway sandwiches with turkey and cheese. The pickles were a hit! Once they finished eating they were able to use there tickets to play ring toss, lion tamer, take pictures at the photo booth, purchase teddy grams and jelly beans, pin the tail on the Zebra, and try and guess how many jelly beans were in the jelly bean jar. If they won any of the games they were given red tickets to redeem at the prize table at the end of the party. Once they were worn out from all of that, we sang happy birthday served yummy cake by Scratch Bakery in Port Warwick, and handed out presents. Lastly, we announced the winner of the jelly bean guessing game, and allowed the kids to redeem their red tickets at the prize table.
 
 
Lessons Learned
Overall it was a great, fun filled, organized event and the children had a great time. I was fortunate to have the help of the older Boys and Girls Club members in carrying out this event. I definitely could not have pulled it off without their help setting up and tearing down, serving food, running games, and just helping out with anything the kids needed. They were awesome! I had pretty much everything I needed for this event except a cake cutter....there's always something. Other than that, I didn't run into too many issues. My suggestions would be to plan ahead, use as many checklists and to do lists as you need, come prepared with extra tape, scissors, writing utensils, etc., and definitely solicit as much help as you can get especially when entertaining a large number of kids!
 
Thanks for reading and I hope this was helpful or at least entertaining to somebody out there. Until next time!
 
Jacquelyne Edith


Tuesday, March 11, 2014

DIY Upcycled Wedding Decor!

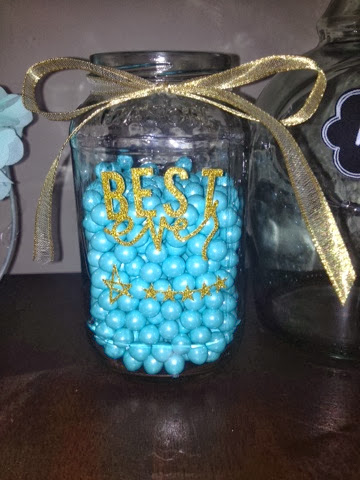
Anyone who knows me knows how much I enjoy upcycling! In my own little way I'm saving the planet and I get to be creative and make cool stuff from the items I recycle. So why would I not incorporate this practice into my business? When working with my first bride, I wanted to stress to her the importance of recycling cans and glass bottles/containers to use as centerpieces, so I decided to make a display for her demonstrating what they'd look like up cycled. A little inspiration never hurt anyone!
 
The can in the pictures is a recycled vegetable can with a chalk board label from Michaels,


 and the candy jar is a recycled spaghetti jar with gold glitter sticker lettering added for detail,
 
These were super easy to make. I used a wet chalk pen on the labels and my glue gun to secure everything! Hope this was helpful to someone out there. Weddings should be elegant and fabulous, but like I always say, they don't have to break the bank!


Saturday, March 8, 2014

DIY Photo Booth Props


Photo booths are huge in the world of weddings right now. I mean, who doesn't want to take silly
pictures with faux mustaches and tops hats? We've all got a little goofy in us.

These particular props were inspired by a post I came across on Pinterest. However, I was in a bit of a hurry so I did not use any stencils to trace, but instead free handed them...which was actually a lot easier than I thought. Ok I lied...I did trace the glasses from a pair of kid foam ones I found in the party section of target. (I'm good, but not that good). Those were the most difficult only because I had to use my etching tool to cut out the frames and that was some heavy duty paper.

Btw all of the materials (hard felt, glammed out craft paper, and sticks) came from The Santuary a.k.a Michaels. I'm sure there are hundreds of free printables you can use to trace your props, but don't be afraid to test your own artistic abilities.

I must say, I suprised myself (half smirks). Anywho let me know if you have any questions and if you do decide to make these post a picture in the comments section. Id love to see...as long as they're not better than mine...jk....kind of.


Friday, March 7, 2014

DIY Wedding Planner

Yesterday I met with my very first Bride. I wanted to do something special for her to let her know I was serious about making every detail of her wedding absolutely spectacular, so I decided to make her a wedding planner.

I purchased the binder and dividers from Office Depot. Their See Jane Work collection is so chic and feminine! After my trip to Office Depot, I dashed over to Michaels to see what I might find to decorate her binder and customize it specifically for her. I found some bejeweled stick on flowers as well as some bright blue glitter lettering I thought would really make her binder pop.

Lastly, I realized I had no idea how to organize a wedding planning binder, so I took a trip to Barnes and Noble and peaked in a few of theirs. They were gorgeous, but pretty pricy if you ask me. I organized her binder into five parts: the big picture, the budget, the wedding party, vendor contacts, and the guests. But you can organize your binder however you like! It only cost me around $15 to make my Brides planner as opposed to the $35+ ones being sold at Barnes and Noble. Being organized when planning a wedding is certainly a must, but so is budgeting expenses. Try and keep costs down when possible and incorporate various DIY's. Planning a great wedding doesn't mean you have to break the bank!